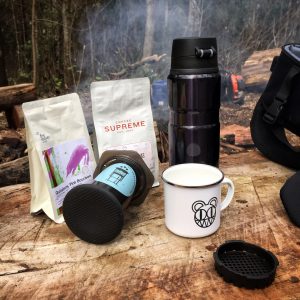
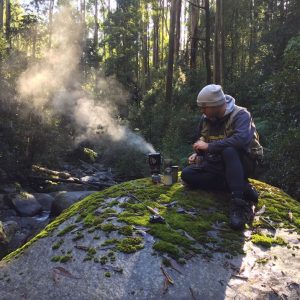
You know the times—we’ve all been there. You’re 2 days into a 3 day trek. Calves burning from a brutal ascent. Pack seems to be getting heavier with every step. All you can think is: “Man I could go for a naturally processed Nicaragua Maracaturra right now…” No? Maybe it’s just me.
Don’t go jumping to conclusions and write me off as some arrogant coffee snob. I still drink instant coffee every morning. But, I also appreciate good coffee. And, there’s something about taking the time to stop and brew a quality cup of coffee out on trails that provides an incredible sensory experience. The rituals, aromas and tastes perfectly compliment the beautiful scenery on any hike.
It doesn’t take much to improve your coffee game on the trails. With minimal additional equipment you can be enjoying and sharing top quality specialty coffee anywhere you go. Let’s take a look at the absolute basics you need (I promise to leave all science and geekery at the door).
Contents
Brewing Advice
Start with an Aeropress. It’s lightweight, practically indestructible, and a very forgiving brew method to learn on.
If you’re not familiar with the Aeropress, it’s essentially like a large syringe that steeps the coffee then forces it through a fine paper or metal filter into your cup. Simple to use and incredibly easy to clean which is an important factor when resources are limited.
The Aeropress is made up of 3 main parts; the plunger, the brew chamber, and the filter basket. The method of use is outlined below.
What’s the Best Coffee for Hiking
Space-saving efforts aside—leave the milk and sugar at home. Single origin specialty-grade filter coffees are roasted to to be enjoyed straight black. Everything about the coffee—from harvesting, processing, to roasting—is performed in a way to highlight the subtle flavours of each specific variety that is instantly ruined by adding milk. If you’re not a black coffee drinker (I definitely wasn’t) I encourage you to head to a cafe that serves specialty filter coffee and try it for yourself. Done right, there’s zero bitterness and the coffee presents amazing fruit flavours that aren’t at all what you get from standard ‘commodity’ coffees.
Specialty coffee roasters are the new micro-breweries—they’re everywhere. Find a local roaster and try coffees from a number of different regions to find what best suits your taste.
Buy your coffee fresh and try and use your beans within a month of the roast date to ensure maximum freshness.
Grinder
Try to grind as close to brewing as possible. Once ground, coffee ages the equivalent of about a week off-roast for every hour it sits exposed to air. Old coffee tastes stale and bland. If you don’t own a small hand grinder to carry on the trails, grind at home (or have a cafe do it for you) and portion into pre-dosed airtight containers.
There are a number of great compact hand grinders out there that fit perfectly into a backpack. The Rhinowares Compact was actually designed to fit inside an Aeropress to save even more space. Whatever brand you buy, avoid blade grinders like the plague and stick with ceramic or metal burr grinders. It’s all about consistency of surface area to aid extraction.
For an Aeropress, grind the coffee to the size and feel of table salt.
Coffee Brewing Method
Because I promised no science or geekery, the explanation below is as basic as it gets. If you want a more technical explanation, feel free to get in touch and I’ll bore you with the details!
- Boil your water
- Grind approximately 16g of coffee
- Add the paper filter to the basket and attach to the brew chamber
- Place the brew chamber with filter on your cup and rinse with a little hot water (this serves to warm the device and cup, and also rinse any paper taste out of the filter before brewing)
- Discard the rinsing water
- Add your coffee to the Aeropress
- Pour in enough water onto the coffee to just cover the grounds
- Stir well and let sit for 30 seconds
- Add 200g of water (just above the number 3 on the side of the Aeropress) and stir gently
- Insert the plunger but don’t press down yet (this creates a seal and stops the water passing through the coffee and into your cup too early)
- At around 2 minutes, press down on the plunger until you hear air hissing out, meaning all the coffee is now in your cup.
- Let cool for a few minutes before enjoying!
Practice makes perfect. Don’t expect to get it right the first time, and when you’re on the trails eyeballing measurements and weights is 100% acceptable. It’s not about attaining perfection, but adding to an already amazing experience and fueling yourself for the remainder of the hike!
Wilderness Brewing Sessions
If you’re new to specialty coffee or just looking for a laid back community to chill with and explore the outdoors and coffee, the Wilderness Brewing Sessions I host in the wilderness surrounding Melbourne are aimed at bringing people together to do just that.
These sessions take the form of a walk, mountain bike ride, or day hike that incorporates a brewing workshop; creating space to learn, ask questions, and try for yourself.
More info on these events on the website.
– Tim Messenger is a hiker/mountain biker/fly fisher/coffee aficionado from the hills east of Melbourne, in Victoria.


1 thought on “How To Make Great Coffee When Hiking”
Credibility is lost when you mention you drink instant every morning…. maybe you’re trying to connect, but I came here looking for good trail coffee